Installation Guide (Parent App)
Prerequisites
- Android Studio
- Git
Project: GegoK12 Parent App
Repository Link:
HTTPS: https://github.com/Gego-K12/gegok12-parent-app.git (opens in a new tab)
1. Install Android Studio
To develop or build the project, you must install Android Studio.
Step 1: Download Android Studio
- Visit the official Android Studio download page: https://developer.android.com/studio (opens in a new tab)
- For a step-by-step installation tutorial, you may refer to: https://www.c-sharpcorner.com/article/how-to-download-and-install-android-studio-in-windows-10/ (opens in a new tab)
Step 2: Install
- After download, double-click the file: Android Studio-ide.exe
- The Android Studio Setup Wizard will open.
- Click Next, follow the prompts, and then click Finish to complete installation.
- When Android Studio opens for the first time, install any SDK components if prompted.
Step 3: Clone the Project Repository
Create a folder on your computer where you want to store your open-source projects (example: C:\GegoK12\ParentApp).
Clone using HTTPS: Open Command Prompt or Git Bash and run:
git clone https://github.com/Gego-K12/gegok12-parent-app.git- Open Android Studio, popup will appear
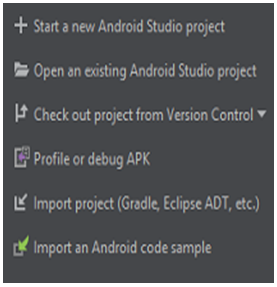
Open Android Studio, popup will appear Click on Open an existing Android Studio project” and select the project (or)
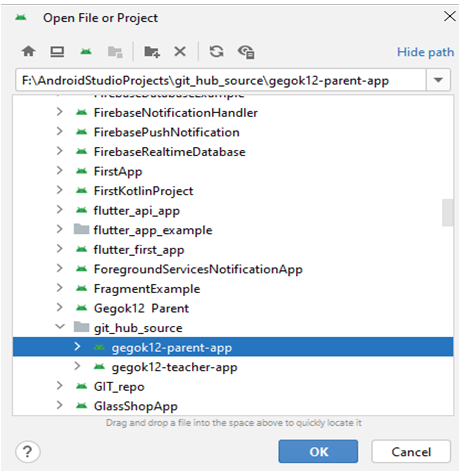
Click File -> Open, Open file or Project window will appear, where you can select your project as follows:
IMPORTANT:
Wait for Gradle Sync and Dependencies to Download
Before proceeding with the project configuration, ensure that Gradle sync is complete and all required dependencies are downloaded.
-
Once you have opened the project in Android Studio, it will automatically attempt to sync with Gradle.
-
You will see a Gradle Sync process running at the bottom of Android Studio. Wait until this process completes.
Note: This process may take a few minutes depending on your internet connection and the size of the project.
-
Once the sync is complete and Gradle dependencies are downloaded, you will see a "Sync finished" message in the status bar.
Until the Gradle sync is complete, do not proceed with any configuration changes, as it may cause errors in building the project or syncing dependencies.
2. Project configuration
Update the Package Name (Refactor)
NOTE:
You must change the package name FIRST before adding google-services.json.
If you add google-services.json first, the Firebase will cause build errors.
Steps:
-
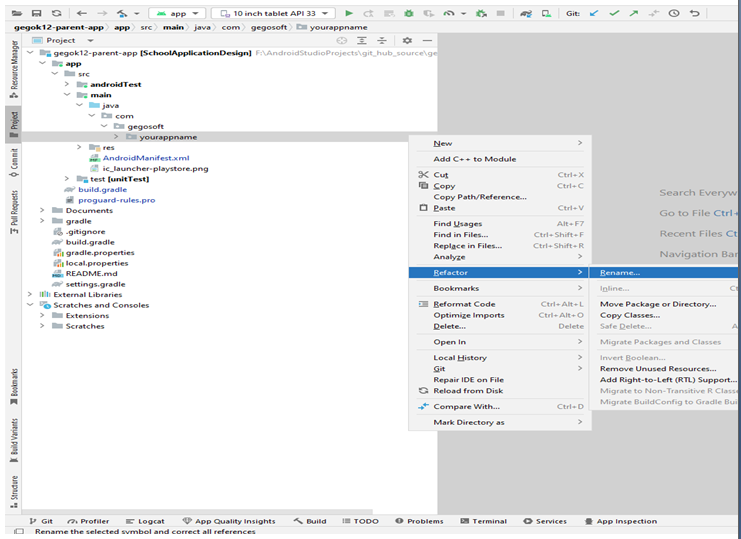
In Android Studio: Right-click → gegosoft/yourappname → refactor → rename → rename package
-
Change from: com.gegosoft.yourappname
-
To your new desired package name.
-
Click Do Refactor.
-
Android Studio will rename all directories, manifests, Gradle namespaces, and references.
After refactor:
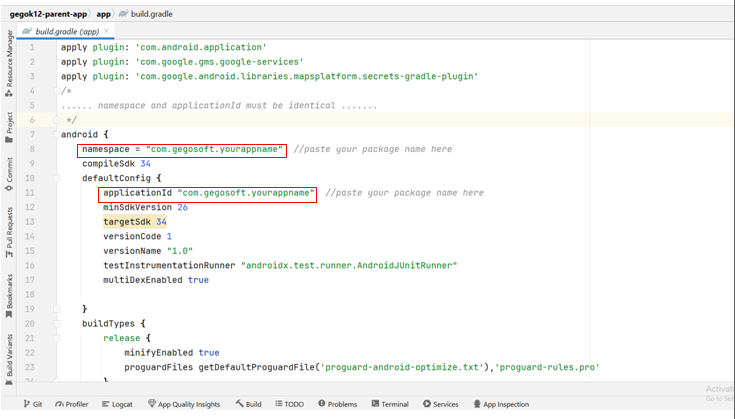
- Check build.gradle (app-level) → namespace "com.xxx.xxx"
- Check AndroidManifest.xml → package="com.xxx.xxx"
✔ Package name and Application ID must be identical.
If Package Name Not Updated Automatically,
After refactoring, check the following sections.
- build.gradle (Module: app)
Look for:
- namespace "com.gegosoft.yourappname"
- applicationId "com.gegosoft.yourappname"
Replace with your new package name:
- namespace "com.<your_company>.<your_app>"
- applicationId "com. .<your_company>.<your_app>"
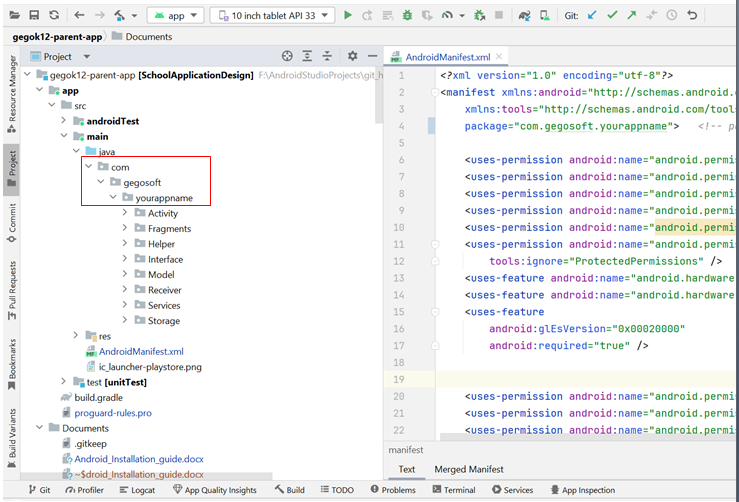
- AndroidManifest.xml
Open - app/src/main/AndroidManifest.xml
Look for :
- package="com.gegosoft.yourappname"

-
Check the Folder structure [ app/src/main/java/com/gegosoft/yourappname/ ]
If the folder names did not change automatically:
→ Right-click the folder → Rename each level manually (com → gegosoft → yourappname)
Note: Add the google-services.json File (AFTER Package Rename)
3. Firebase configuration
-
refer this link - https://alphatech.technology/Blog-Entry-srk/Google-Services-Json-bek/ (opens in a new tab) and get google-services.json from https://console.firebase.google.com/ (opens in a new tab) and place it under app folder
project → app → google-services.json
-
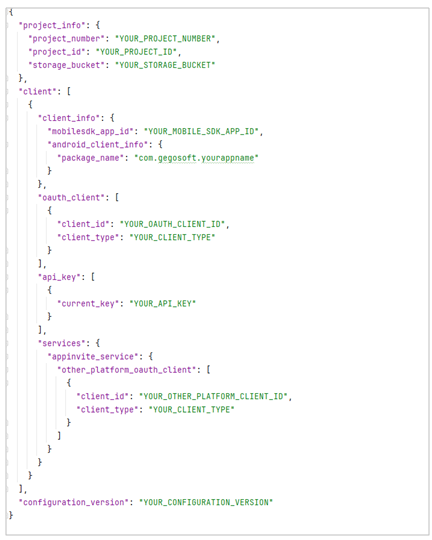
Reference JSON Structure [Please generate google-services.json with your package name]:
Note: Please do not change or rename the google-services.json file. If a previous file exists, remove it and add the newly generated file from Firebase.
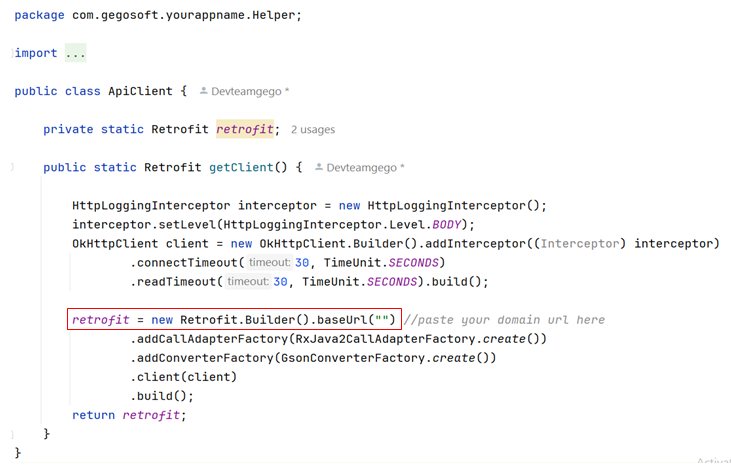
4. Update Domain URL
- Paste your domain URL in the ApiClient file [app\src\main\java\com\gegosoft\yourappname\Helper\ApiClient ]
5. Google Maps API Key Configuration
This project uses Google Maps, so you must add your own API key.
-
Get your API key from Google Cloud Console (https://console.cloud.google.com/apis/credentials (opens in a new tab)).
-
Add the key in the following places:
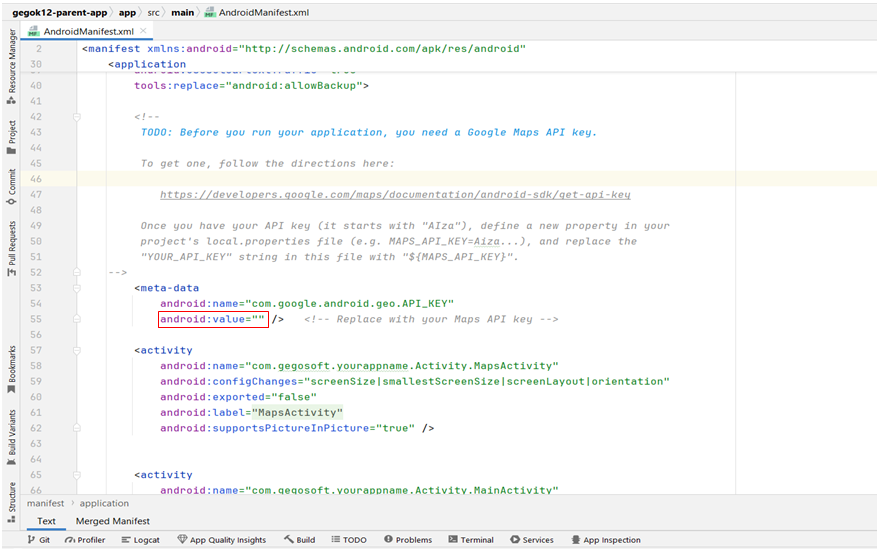
- AndroidManifest.xml
android:value="YOUR_GOOGLE_MAPS_API_KEY"
- MapsActivity.java (app\src\main\java\com\gegosoft\yourappname\Activity) Replace the empty string with your key:
String MAPS_API_KEY = "YOUR_GOOGLE_MAPS_API_KEY";
//replace with your Google Maps API key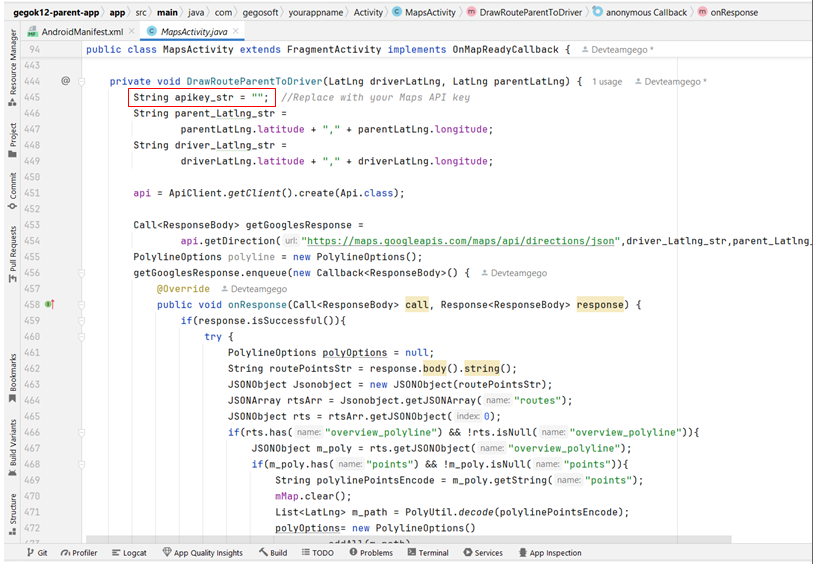
Confirm Everything Is Updated
- The package name in code
- The folder directories
- The
namespaceandapplicationId - The manifest
packageattribute - Your Firebase google-services.json package field
- Check Google Maps API key in Manifest and
MapsActivity.java - Check domain URL in
ApiClient.java
6. Updating the App Name and App Icon
- Updating the App Name
The app name appears on the device's home screen and in the app launcher. You can update the app name by modifying the strings.xml file and ensuring it is correctly referenced in the AndroidManifest.xml.
Steps:
1. Locate and Edit the strings.xml File:
-
Navigate to res/values/strings.xml.
-
Find the app name entry, which is usually defined as:
-
<string name="app_name">Parent Demo School</string>
2. Update the App Name:
-
Change the value of app_name to your desired app name:
-
<string name="app_name">YourAppName</string>

3. Check the AndroidManifest.xml File:
-
Ensure that the android:label attribute in the <application> tag points to the app_name string resource:
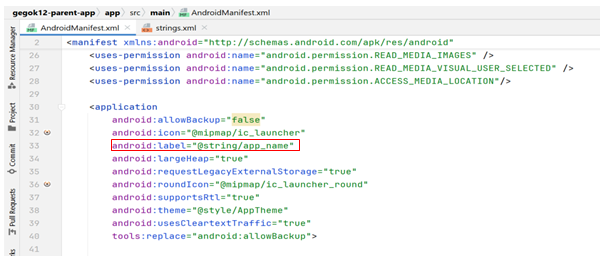
-
Updating the App Icon
The app icon is the image shown on the device's home screen and in the app launcher.
Steps:
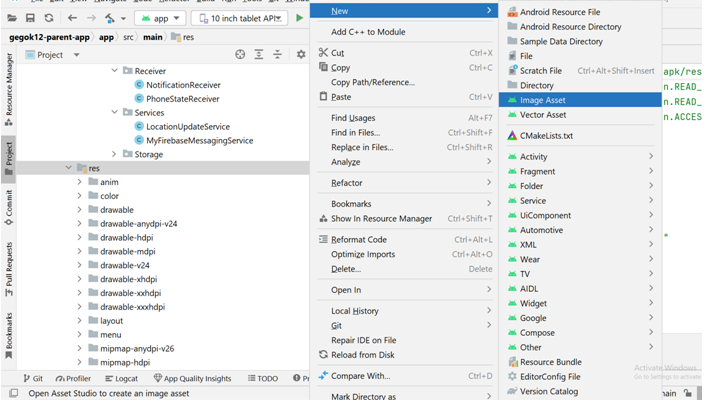
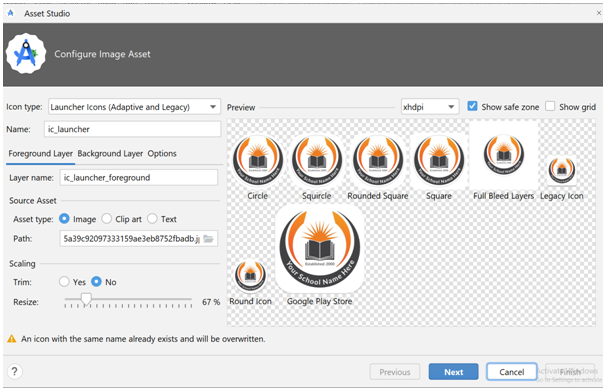
1. Open Image Asset Studio:
-
Right-click on the res folder in the project view.
-
Navigate to New > Image Asset.
2. Choose Icon Type:
- In the "Asset Studio" window, under "Icon Type," choose Launcher Icons (Adaptive and Legacy).
- This will give you the option to select a vector image, clipart, or your own custom image for the app icon.
3. Set the Icon:
- Click on the icon area to browse [Source Assest section → Path] and select your new icon image.
- Adjust the image (resize, reposition, etc.) as necessary to ensure it looks good.
- Image Asset Studio will automatically create the required icon sizes for different screen densities (hdpi, mdpi, xhdpi, xxhdpi, xxxhdpi).
4. Review and Apply:
- Review the icon preview to ensure it looks correct across all densities.
- Once satisfied, click Next and then Finish to apply the icon.
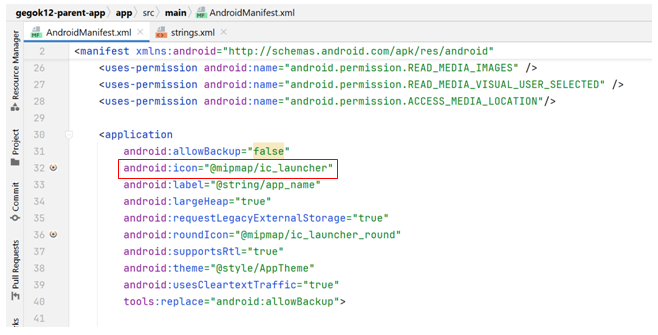
5. Verify in AndroidManifest.xml:
- Ensure the <application> tag in the AndroidManifest.xml file references the correct icon (it should automatically update to @mipmap/ic_launcher):
7. Sync the Project & Build
- Click Sync Now
- Build and run the project
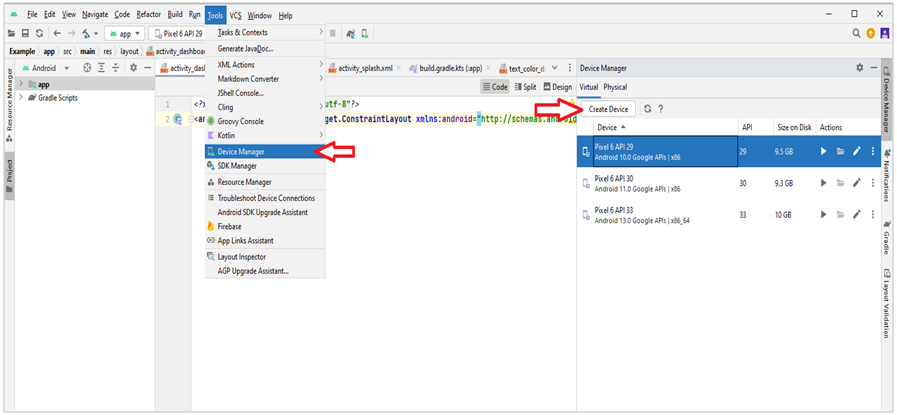
a) For creating virtual devices, from menu - select Tools -> Device Manager or you can select the icon given in the below image:

b) To run the project in emulator, from menu - select Run -> Run ‘app’ or you can select the icon given in the below image:


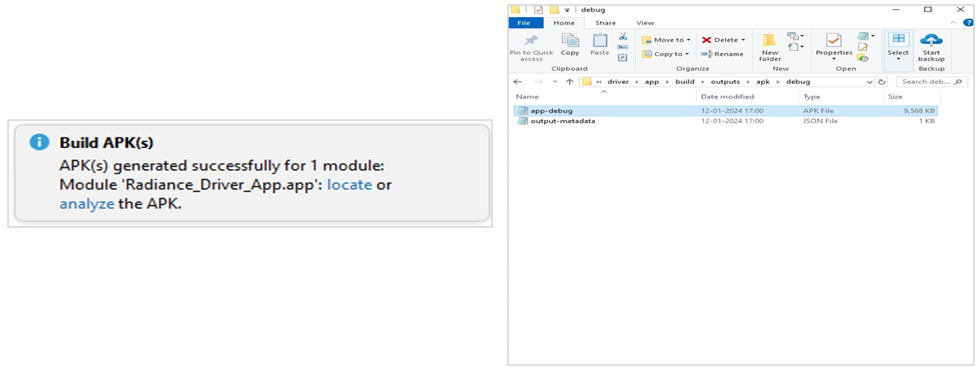
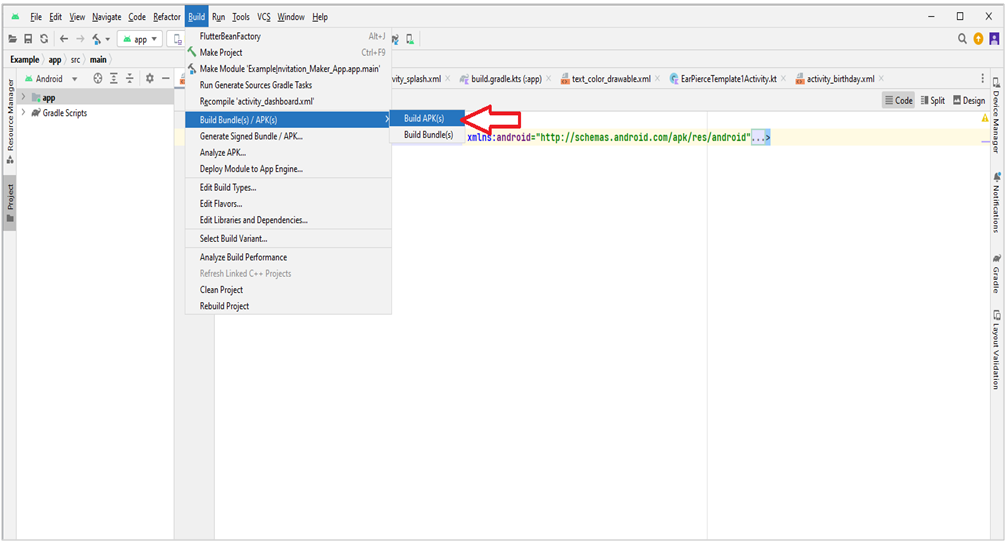
c) To build apk file (.apk), from menu - select Build -> Build Bundle(s)/ APK(s) -> Build APK(s).
d) At bottom right Build APK(s) popup will appear, click locate from the popup. It redirects to the folder, please click on debug folder , app-debug is the apk file, you can rename it by right-click on it.