Inventory Management
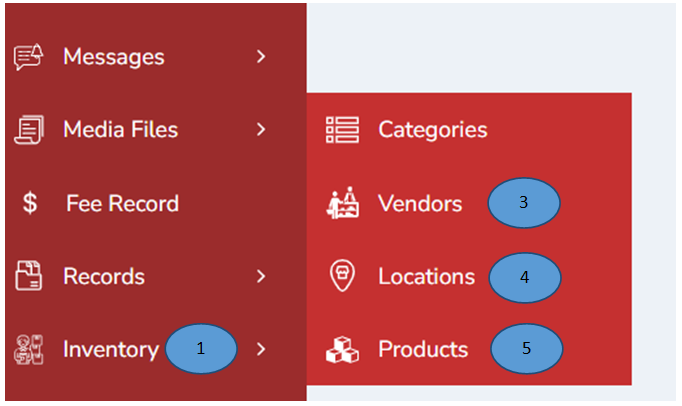
- Click on “Inventory” from the left menu pane.

- Click the “Add” button on the top-right corner, fill the details and click submit.
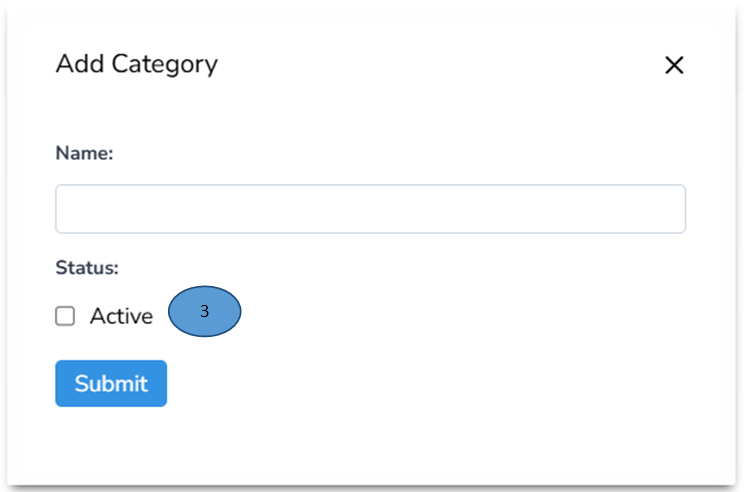
- Click the status as Active, The new category will be added as shown below
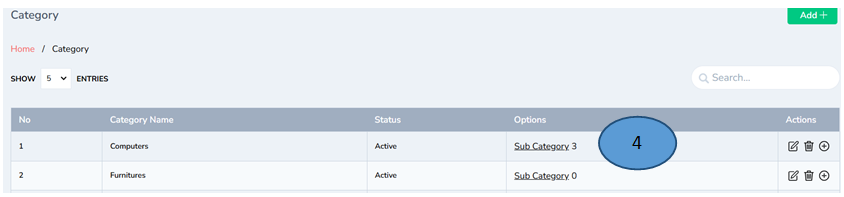
- A sub category will be added by clicking subcategory from the options

- To add the details in the subcategory click add on the click top corner and fill the details. Click “Submit sub category will be successfully added.
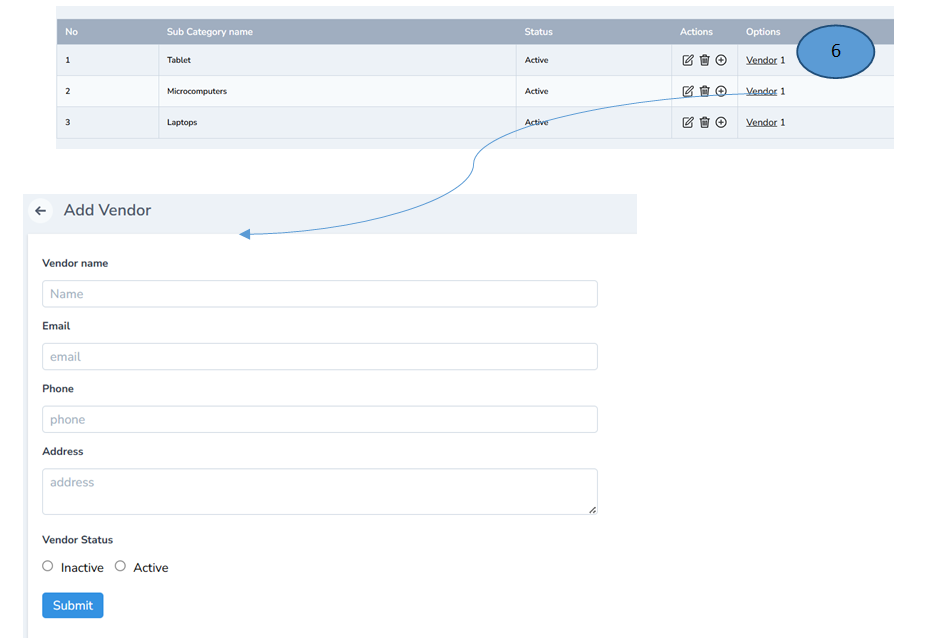
-
Click Vendor 1 and add the details and click submit.
-
The vendor details will be listed as shown
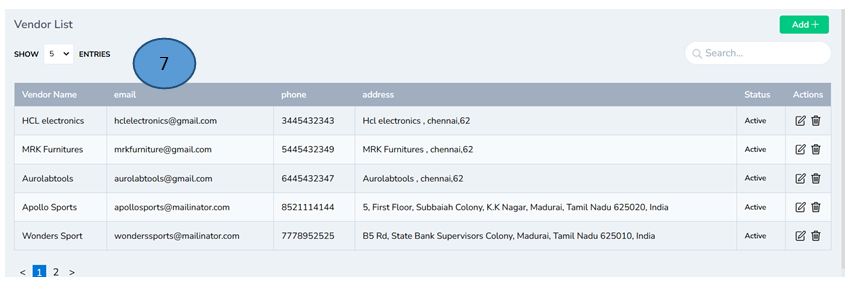
Note: Edit and delete options are displayed in the actions tab
-
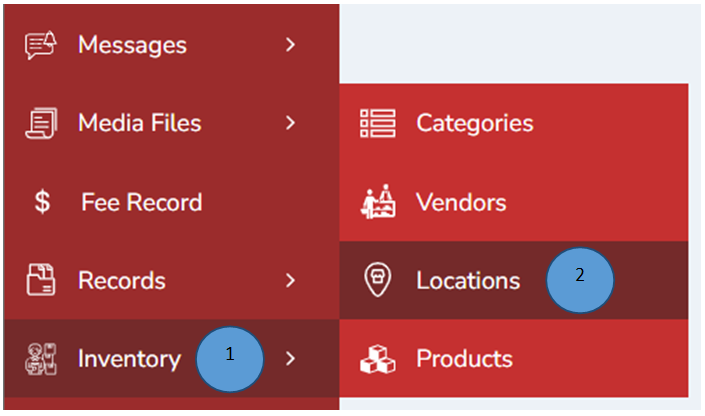
Click Inventory from the left pane
-
Click Locations on the side tab

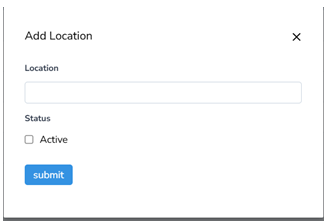
- Click Add button on the right top corner to add the location of the product and enter the location and click submit.

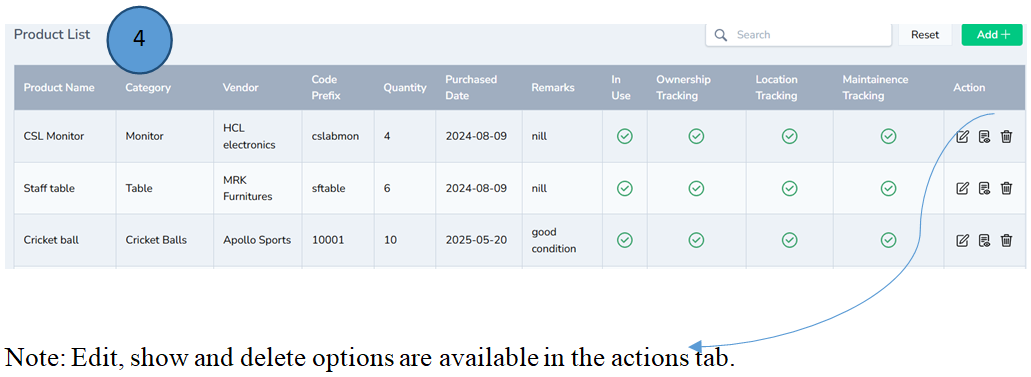
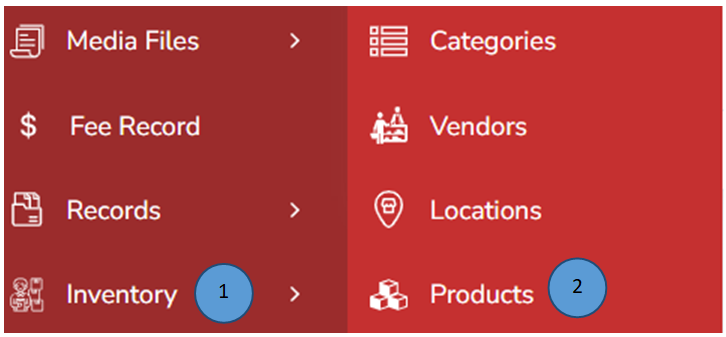
To add Products
-
Click Inventory from the left pane
-
Click products on the side menu

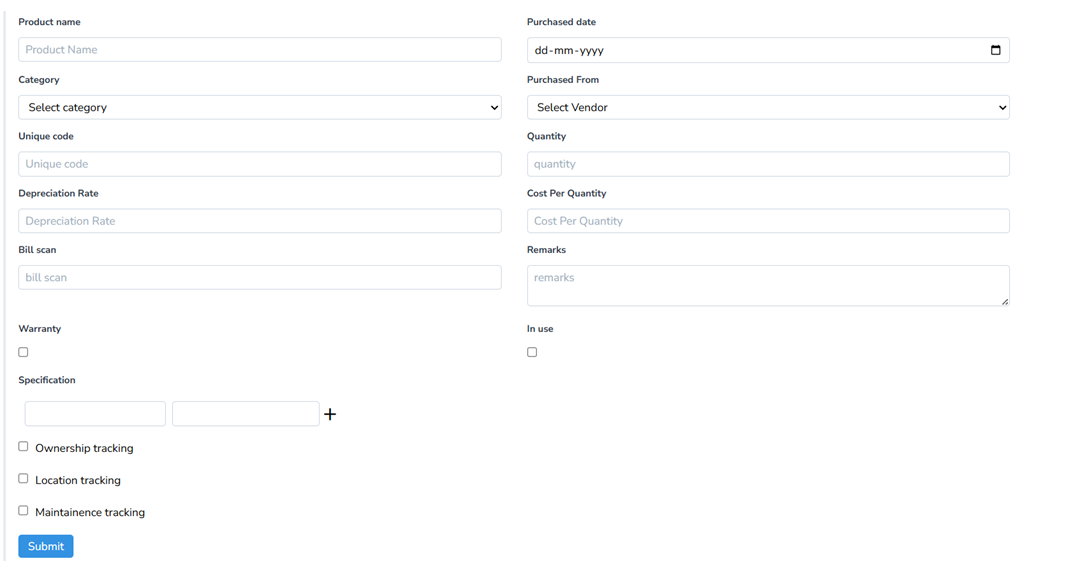
- Add Add products on the right top corner and new will be displayed. Fill all the details and click submit.
- A new product list will be created and all the products will be listed down for any reference.